Preview
How to Setup and Optimize PCSX2 BIOS for Perfect Emulation?
If you are a seasonal gamer and know the era of the 90s, you must wish to play games of your most beloved Play Station 2 on your PC. You can play nostalgic games on PC with the help of the PCSX2 emulator and its excellent BIOS.
PCSX2 BIOS is the core of your computer's unreal PlayStation 2. It holds all the secrets and memories from the PS2, ensuring your games play just right.
You need to find and download this BIOS to make your games work. It's not difficult once you know how! Look at BIOS and how to start playing PS2 games on your PC. So, are you ready to start the adventure? Let’s start it!
What is PCSX2 BIOS?
The PCSX2 BIOS is a critical component needed to operate the PCSX2 emulator. It contains the original PlayStation 2's system files, which are required for an exact emulation on your computer. Without the BIOS, you cannot play any PS2 games with PCSX2.
- The BIOS files contain essential system routines, memory management, and hardware interactions. Using the correct BIOS, PCSX2 can accurately imitate the PS2's functionality, guaranteeing that games run as they would on the original system.
- Like the PS2, PCSX2 supports several BIOS versions for different regions. Users can select the proper BIOS for the game area they wish to play.
Think of it as the emulator’s operating system—it ensures that games behave as intended on the original hardware. To set it up, you must download the BIOS files and configure PCSX2 to recognize their location. Once that’s done, you can enjoy classic PS2 gaming on your PC!
How to Obtain a BIOS for PCSX2?
To set up PCSX2 and obtain the necessary BIOS, follow these steps:
Download and Install PCSX2:
- Go to the PCSX2 Emulator section on our website.
- Install the program on your computer.
Download the PS2 BIOS:
- The BIOS (Basic Input/Output System) is essential for PCSX2 to emulate an actual PlayStation 2.
- Visit the PCSX2 BIOS download page or other trusted sources.
- Download the BIOS file (usually a ZIP file) and extract its contents to a folder on your computer.
- When you first launch PCSX2, it will prompt you to set up your default language and specify the BIOS location (the folder where you extracted the BIOS files).
Methods for Dumping BIOS from a Play Station 2 Console
Before we proceed, it’s essential to understand that BIOS dumping involves extracting the PS2’s system firmware. This process is necessary for running the PCSX2 emulator. To dump the BIOS, you need to modify your PS2 so that it can run any program. Here are some popular methods:
FreeMcBoot Memory Card: This card works for most PS2 models except the newest slim ones. You can find FreeMcBoot memory cards online.
Fortuna Memory Card: It also works for all slim models. Available for a similar price.
FreeDVDBoot: This works for many slim models. It requires a blank DVD. Download the ISO matching your console and burn it to a DVD.
Disc Swap Exploits: These are technical and involve hardware tampering. Guides can be found online.
Mod Chips: Extremely technical and require soldering skills. Only attempt if you’re an electronics pro. Note that modchips can affect BIOS dump quality, so install and then turn off the modchip.
Required Tools and Software for BIOS Dumping
Only some tools and software are available for BIOS Dumping. We only found two major ones: BIOS DRAIN and the newly launched BIOS Dumper v2.0. To dump the BIOS, we recommend using the biosdrain utility. It supports both USB and HOST through PS2link.
Step-by-step guide to Dumping your own BIOS
Step 1: Prepare Your PS2
- Make sure your PS2 is turned off before starting.
- Save any work on your computer because we'll only access settings when the PS2 is off.
Step 2: Choose a BIOS Dumping Method
There are different methods you can use, depending on your PS2 model:
- FreeMcBoot Memory Card
- Fortuna Memory Card
- FreeDVDBoot
- Disc Swap Exploits
- Mod Chips
Choose the method that works best for your PS2. We have already discussed the abovementioned methods, so you can choose one that fits your needs and system.
Step 3: Download the BIOS Dumper Utility (bios-drain)
We recommend using biosdrain. Download the latest version of biosdrain. There are two main ways to start your PS2 with this utility:
Option 1: Starting a PS2 with FreeMcBoot
- Plug the FreeMcBoot memory card into memory card port 1.
- Turn on your PS2 with no disc inside.
- Select uLaunchELF from the menu.
Option 2: Starting a PS2 with FreeDVDBoot
- Download the ISO file that matches your console from FreeDVDBoot's GitHub Repo.
- Burn the ISO to a DVD.
- Use a DVD-R disc and burn it slowly (4X speed is good).
- Insert the burned FreeDVDBoot disc and then reset/turn on your PS2. uLaunchELF should open.
Step 4: Dump the BIOS
There are two ways to dump the BIOS: USB and HOST through PS2link. If your console doesn't have network support, use the USB method.
USB Method
- Transfer the biosdrain.elf file to a FAT32 formatted USB flash drive.
- Insert the USB flash drive into your PS2.
- In uLaunchELF, go to the device named mass: and open it.
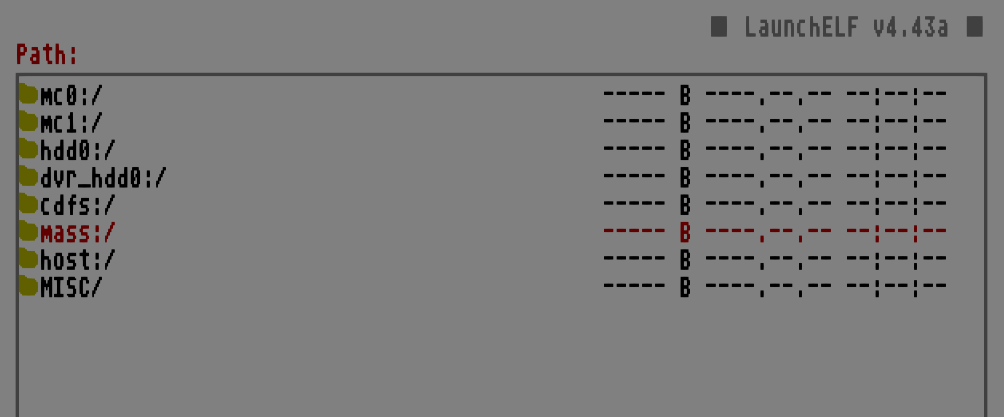
- Find and run biosdrain.elf.
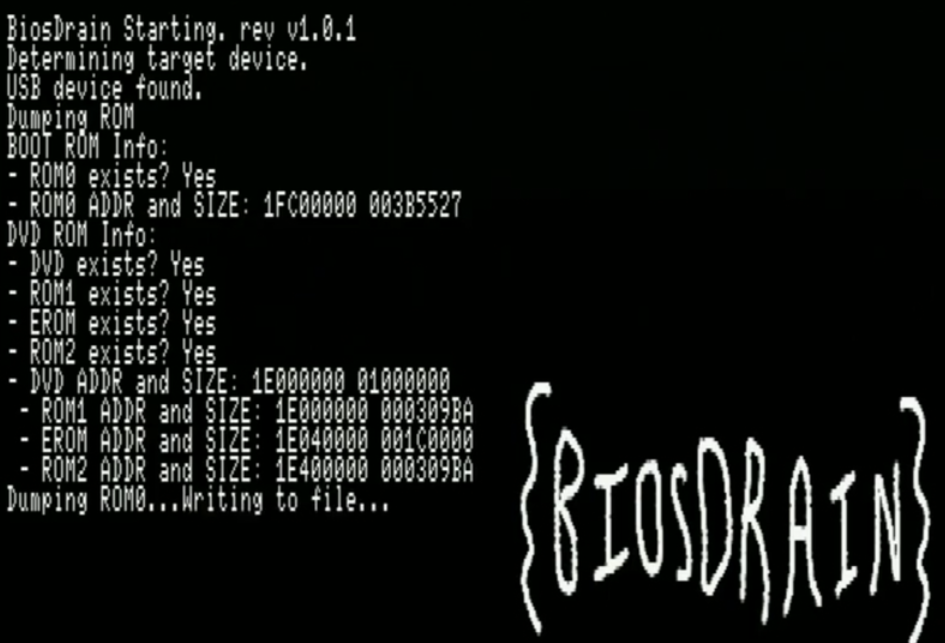
- Wait until biosdrain says, "Finished Everything." The USB process is slow, so be patient.
- When done, plug the USB drive back into your computer.
- You should see files ending in .rom0, .rom1, .nvm, etc., on your USB drive.
PS2client Method
Use this method only if your console has network support:
- When using XLINK, run biosdrain.elf with the user interface.
- When using PS2client, go to the directory with biosdrain.elf and run PS2client exceed the host.elf.
- Biosdrain will dump your BIOS contents into the host's root directory (usually where you have biosdrain.elf).
- Wait until biosdrain says "Finished Everything" on the screen or in your console log.
Always use your own legitimate BIOS and game copies for ethical and legal reasons.
How to Import and Configure the BIOS?
The PlayStation 2 BIOS is required to boot games. This is a separate download after you've downloaded PCSX2. Let’s move into each step of the configuration of BIOS in detail:
1. Locate the BIOS Directory in PCSX2
Now that you've set up the emulator let's ensure it runs smoothly on your favorite PS2 games. Follow these steps:
- Find the PCSX2 folder in your Start menu and open it.
- If you have an install wizard, double-click its icon on your desktop or find PCSX2 in Windows.
- When you open PCSX2, you'll see a screen called "First Time Configuration." Click "Next."
If you accidentally close the "First Time Configuration" screen! You can still set up the BIOS files. Go to "Config" and then "Plugin/BIOS Selector." From there, follow the steps to add the BIOS files.
2. Import the BIOS File
To get your PCSX2 emulator ready, follow these easy steps:
- Start Setup: First, you'll see the First Time Configuration screen. Click “Next.”
- Check Plug-ins: You'll see a list of plug-ins. Just click “Next” again.
- Open BIOS: When the BIOS screen shows up, click “Open in Explorer” at the bottom right.
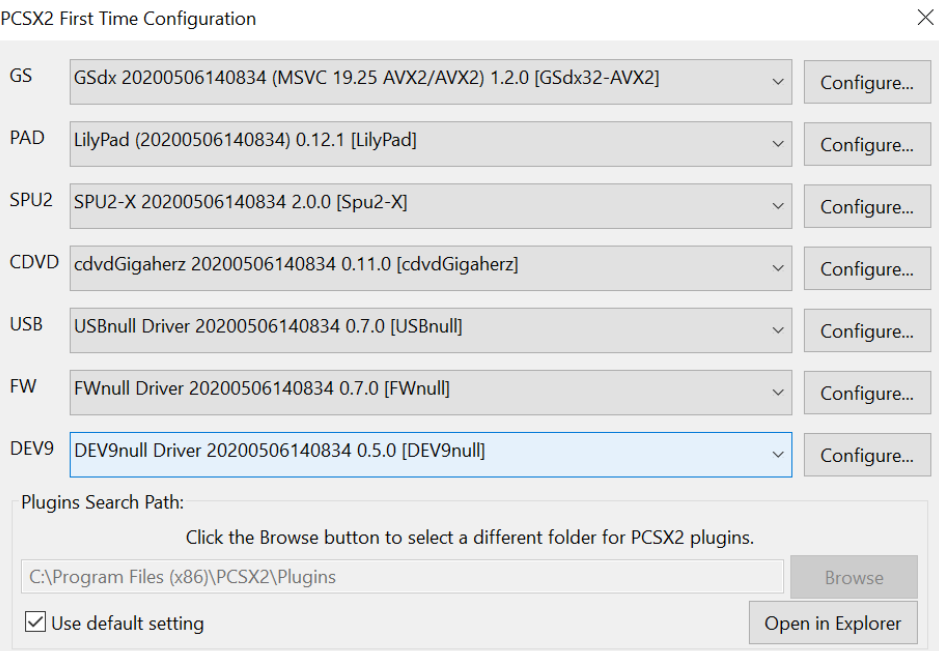
- Create Folder: A message will pop up saying, “This path does not exist. Can you create it?” Click “Create.”
- Find Folder: Now, you must find your BIOS files. Minimize the window and remember where this folder is on your computer.
- Move Files: Open that folder and drag the unpacked BIOS files into it.
- Refresh List: Return to the First Time Configuration window and click “Refresh list.” You'll see BIOS files for Japan, Europe, and the USA in the white box.
Now, your PCSX2 emulator is fully set up and ready to use!
3. Troubleshoot BIOS Setup Issues
If you’re encountering issues with the PCSX2 BIOS setup, here are some troubleshooting steps you can follow:
Check Your BIOS Files
- Ensure that you have the necessary BIOS files for PCSX2. These files are essential for proper emulation.
- Avoid using the SCPH10000.BIN BIOS for maximum compatibility, as it may cause problems with memory card emulation and other sections.
- You can find BIOS files online or dump them from your PlayStation 2 console using the BIOS dumper on the PCSX2 website.
Verify Configuration Settings
- Double-check your PCSX2 configuration settings. Make sure you’ve selected the correct plugins and settings for your system.
- Incorrect settings can prevent ISO files from loading properly.
Folder Structure
- Make sure your BIOS files are placed in the correct folder structure:
- Create a folder named “pcsx2” (all lowercase) within the “system” folder of RetroArch.
- Inside the “pcsx2” folder, create subfolders: “bios,” “cheats,” “cheats_ws,” and “memcards.”
- Save your BIOS files in the “bios” folder.
Screenshots and Documentation
- Take a screenshot of your Explorer window showing the full path to the BIOS folder.
- Compare your steps with the documentation to ensure you haven’t missed anything.
Remember, having the suitable BIOS files and correct settings is crucial for PCSX2 to function correctly.
4. Back Up BIOS and Configurations
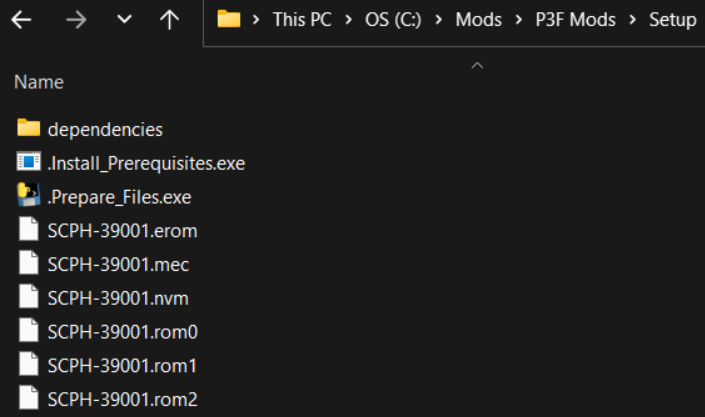
The backup of your PCSX2 BIOS and configurations is stored in the BIOS folder within PCSX2. When you open PCSX2, use the “Open in Explorer” button to locate the BIOS folder (as we did while configuring the BIOS in the first step).
PCSX2 BIOS FAQs
Is it legal to download a BIOS file for PCSX2?
Downloading BIOS files from the internet is legal as long as you own a physical PS2 device. All you have to do is dump BIOS files directly from your own PS2 console and using them with PCSX2 on your PC. If you own a PlayStation 2, you may legally copy the BIOS to your computer and use it in the emulator.
Can I use a BIOS from any PlayStation 2 region with PCSX2?
Yes, you may use any PlayStation 2 region's BIOS using PCSX2. The emulator is accessible with BIOS files from many locations, allowing you to select the one that matches your PS2 console.
What are the risks of downloading BIOS files from the internet?
There are no risks of downloading files from our website. We regularly scan our archives for malware and viruses and make sure the visitors are protected!
How can I check if my BIOS file is compatible with PCSX2?
Follow these procedures to determine whether your BIOS file is PCSX2 compatible:
- File name: Make sure the BIOS file has the correct name.
- Checksum: Verify the checksum in your BIOS file. PCSX2 includes a built-in checksum checker. Go to "Config" > "Plugin/BIOS Selector" > "Check MD5" and choose your BIOS file.
- Region Compatibility: Make sure the BIOS file corresponds to the region of your PS2 console.
- BIOS Version: Check your BIOS version. PCSX2 works best with BIOS versions 1.60 or 1.70. If your BIOS is an older version, consider updating it.
Remember that the recommended approach is using a BIOS file legally obtained from your own console.
Why is my BIOS file showing as invalid in PCSX2?
There are several reasons why your BIOS file might be showing as invalid in PCSX2:
- Incorrect File Path
- File Name Mismatch
- Corrupted File
- Checksum Error
- BIOS Version
- Area Mismatch
Conclusion
Setting up and configuring the PCSX2 BIOS for emulation is critical for playing PlayStation 2 games on your computer. The PCSX2 BIOS is the console's operating system, ensuring accurate and fluid gameplay.
By following the procedures to download, install, configure, and dump your BIOS configuration, you can deliver a smooth gaming experience. Remember always to use BIOS files legally obtained from your PlayStation 2 to stay within legal and ethical boundaries. Enjoy your gaming adventure!