Preview
Install & Configure Different Controllers and Controls on PCSX2
Setting up controllers for the PCSX2 emulator can be tricky. Different controllers, connections, and configurations often present challenges.
Suppose you are excited to play your favorite PlayStation 2 games on your PC and discover that your controller is not working. Yes, it is frustrating and spoils your mood, as you can not play your game right now.
However, every problem has a solution so this article will help you quickly configure your controller for the PCSX2 emulator. Our step-by-step instructions will help you get the USB, Bluthtoo, or Xbox controller to work correctly. Let's make sure you can enjoy your favorite games without any problem!
Preparing for Pcsx2 Setup Controller
Before installing PCSX2 and configuring your controller, ensure your computer meets the requirements. The system requirements and prerequisites for PCSX2 are as follows:
Operating System
Windows: Windows 10 (64-bit) Version 22H2 or higher.
Linux: Ubuntu 23.04/Debian or newer, Arch Linux, or other distros (64-bit).
macOS: macOS 11.0 or later1.
Hardware
CPU: Your processor should support SSE4.1 instructions.
RAM: At least 8 GB of RAM.
Graphics Card: DirectX 10 or OpenGL 3 compatible graphics card.
Different Types of Controllers for PCSX2 Emulator
Let's look at the numerous controllers that may be used with the PCSX2 emulator. Whether you want a tethered USB controller or a wireless Bluetooth one.
Connecting USB Controller to PCSX2
If you own a USB controller, attach it to PCSX2 by following these instructions:
Attach your USB controller to a computer's accessible USB port.
Launch PCSX2 on your computer.
Go to “Config” in the PCSX2 menu.
Select “Controllers (PAD)” and then “Plugin Settings.”
Choose your controller from the drop-down menu.
Map the buttons by selecting each and hitting the matching button on your controller.
Click the “Test Device” button to ensure all buttons and analog sticks work correctly.

Once satisfied with the button mapping, click “OK” to save your configuration.
Load your favorite PS2 game ISO in PCSX2 and start playing using your USB controller!
Connecting Bluetooth Controller to PCSX2
If you have a Bluetooth controller, then perform these steps:
Make sure your Bluetooth controller is linked to your PC. Pairing instructions may be found in the documentation for your controller.
Launch PCSX2.
Go to “Config” in the PCSX2 menu.
Select “Controllers (PAD)” and then “Plugin Settings.”
Select your Bluetooth controller from the dropdown menu.
Map the buttons by selecting each and hitting the matching button on your controller.
Click the “Test Device” button to verify that all buttons and analog sticks function correctly.
Once satisfied with the button mapping, click “OK” to save your configuration.
Load your PS2 game ISO and enjoy playing with your Bluetooth controller!
Remember to check if your specific controller model is compatible with PCSX2. Some controllers may require additional drivers or software.
How to Connect PCSX 2 Controller Based on Brand?
Let's look at how to use various manufacturers to set up controllers for the PCSX2 emulator.
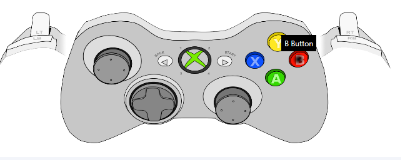
PCSX2 Emulator XBOX Controller Setup
To configure an Xbox controller with PCSX2, follow these steps:
Connect Your Xbox Controller
Use a USB wire to connect your Xbox controller to your PC.
Connect your Xbox wireless controller to the system using a wireless adapter or Bluetooth.
Open PCSX2
Launch the PCSX2 emulator.
Go to the “Config” tab and select “Controllers (PAD).”
Plugin Settings
To customize your controller, click on "Plugin Settings".
Select the "DX Controller Xbox 360 for Windows" option.
Map Buttons
Test your controller by pressing and assigning them to the corresponding PS2 buttons.
To save the settings, click "Apply" followed by "OK."
PCSX2 Emulator PlayStation 3(PS3) Controller Setup
To connect a PS3 controller to PCSX2, follow these steps:
Install SCP Toolkit
Download and install the SCP Toolkit program. This enables your PC to identify the PS3 controller as an Xbox controller.
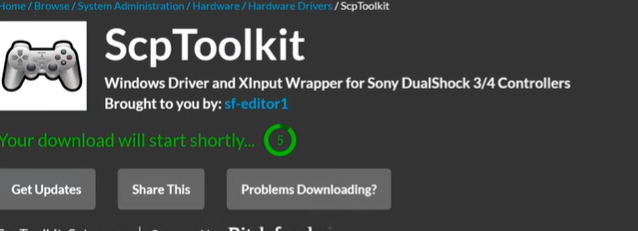
Connect your PlayStation 3 controller to your PC via USB.
Configure in PCSX2
Open PCSX2 and go to “Config” > “Controllers (PAD).”
Select “Plugin Settings” and choose the “DX controller Xbox 360 for Windows” option.
Test and Map Buttons
Test your PS3 controller in the emulator.
Assign buttons to the corresponding PS2 buttons.
Wired or Wireless
The PS3 controller may be wired (via USB) or wirelessly.
PCSX2 Emulator PS4 & PS5 Controller Setup
For PS4 and PS5 controllers, follow these steps:
Connect Your Controller
Connect your PS4 or PS5 controller to your PC via USB or Bluetooth.
Make sure your system recognizes it.
PCSX2 Settings
Open PCSX2 and go to “Config” > “Controllers (PAD).”
Choose the appropriate controller type:
For PS4 controllers, select “PS4 Dualshock 4 enhanced mode.”

For PS5 controllers, select “PS5 DualSense enhanced mode.”
Automatic Mapping
Use automatic mapping if available.
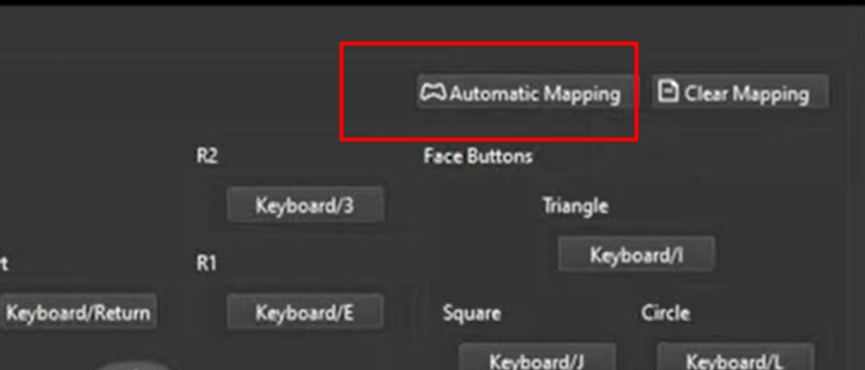
If not, manually map the buttons to your controller.
LED Control (DualShock 4/DualSense)
Enable the enhanced mode with an official DualShock 4 or DualSense controller.
You can control LEDs using the lightbulb icon in the SDL section.
Remember to test your controller settings and enjoy playing PS2 games on PCSX2!
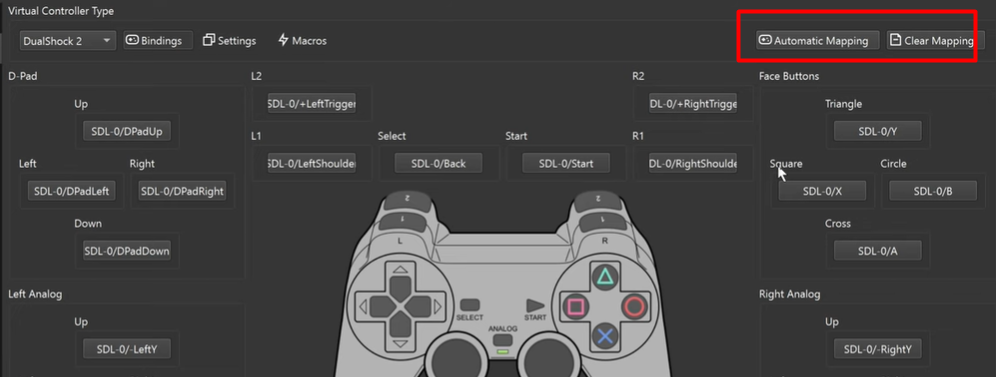
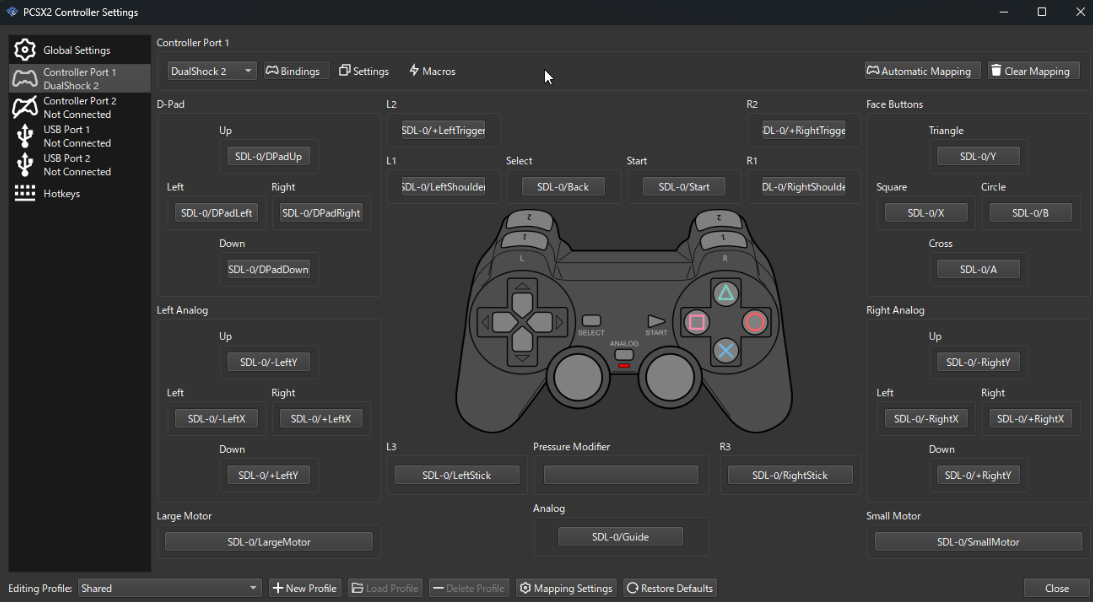
Configuring Controller on PCSX2 Emulator
Configuring a controller for the PCSX2 emulator is essential for an enjoyable gaming experience. We'll guide you through the procedure whether you're using a PlayStation 4 (PS4) controller, an Xbox controller, or another input device.
Connect Your Controller
First, ensure that your controller is attached to your computer. The controller may be connected via USB cable or Bluetooth.
Access Controller Settings in PCSX2
Launch PCSX2 and navigate to the “Config” menu.
Select “Controllers (PAD)” to access the controller configuration settings.
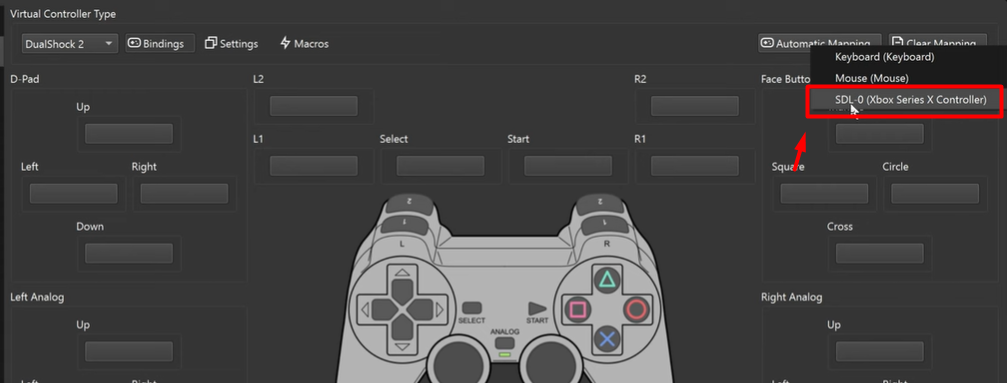
Choose Your Input Source
In the controller settings, you’ll find different input sources to choose from:
SDL (Recommended): This is the preferred input source. It works well across various operating systems.
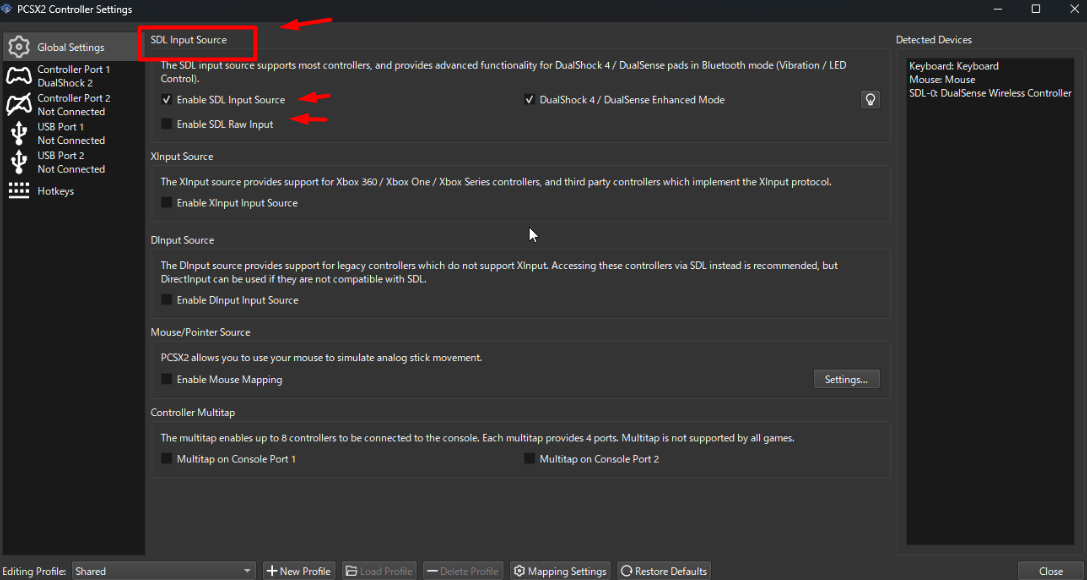
SDL Raw Input: Use this if your controller is unresponsive or sending incorrect inputs. You’ll need to map controls manually.
DualShock 4 / DualSense Enhanced Mode: Enable this for official DualShock 4 and DualSense controllers. It provides additional features like LED control and proper vibration2.
Mapping Buttons
Start by checking if your controller supports automatic mapping.
Click the “Automatic Mapping” button. If not available, you’ll need to map buttons manually.
For SDL Raw Input, manual mapping is necessary.
Some third-party controllers may require manual mapping even with SDL enabled.
Manual Button Mapping:
If automatic mapping isn’t available, map buttons manually:
Click on the button you want to configure (e.g., “Triangle” on a PS2 controller).
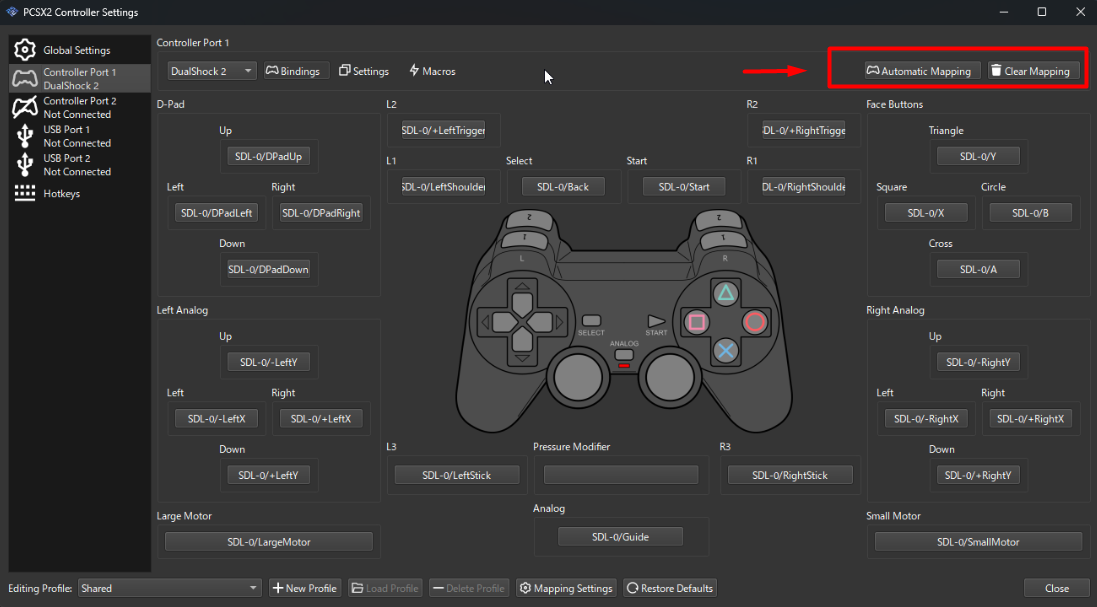
Press the corresponding button/key on your controller.
Repeat for all buttons.
Adjust sensitivity and dead zones as needed.
Testing Your Input Mapping:
Unfortunately, PCSX2 doesn’t have a built-in way to test inputs directly from the UI. However, you can use the PS2 Pad Tester ELF file to test your controller inputs. Simply drag and drop it into the PCSX2 main window. Remember that each controller may have unique quirks, so feel free to experiment and change the settings.
Configuring Keyboard Controls on PCSX Emulator
Configuring keyboard controls for the PCSX2 emulator is critical to improving your gaming experience. Here's how to set up keyboard controllers on PCSX2:
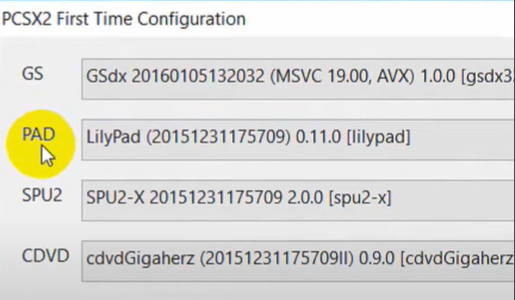
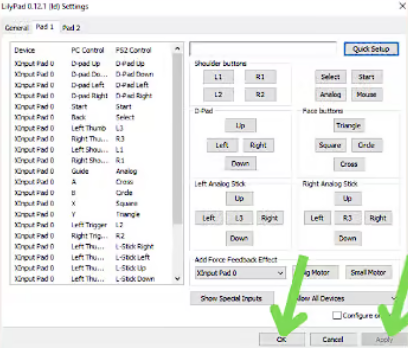
Configure Controls Using LilyPad
LilyPad is an input plugin that supports keyboard, mouse, Xbox 360, and third-party controllers.
Go to the “Config” menu and select “Controllers (PAD) -> Plugin Settings.”
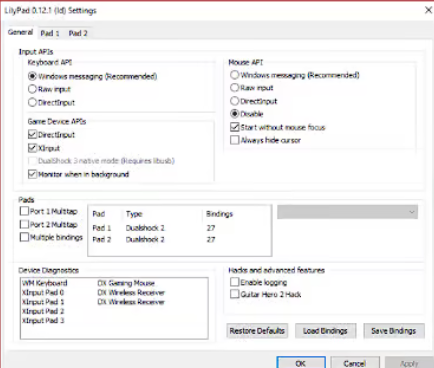
Choose “LilyPad” from the “PAD” dropdown menu.
Click “Configure” to access the LilyPad plugin settings.
Button Configuration
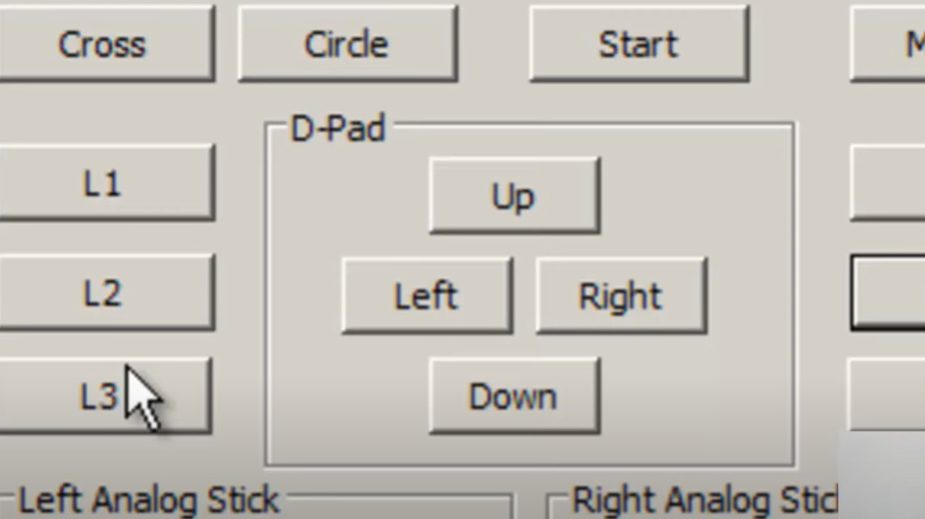
In the “Pad 1” tab, you’ll see a list of buttons corresponding to a PS2 controller.
Click on a button (e.g., “Triangle”) to enter editing mode.
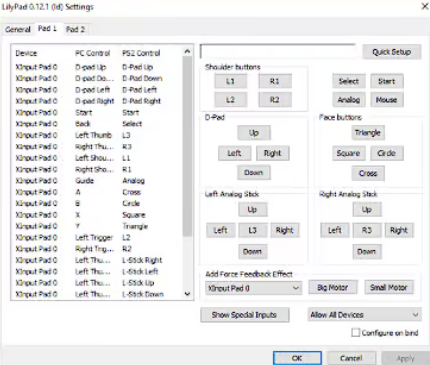
Press the key on your keyboard to bind to that button. The input will appear on the left as a saved binding.
Repeat this process for all buttons on the controller.
Adjust the sensitivity slider if needed. Sensitivity affects trigger or analog stick movements.
You can also enable “Turbo” for rapid button presses when held down.
Save and Test
Once configuring all buttons, click “Apply” and “OK” to save the settings.
Test your controls in a game to ensure they work as expected.
Remember that if needed, you can always change the active plugin or reset critical bindings from the “Config” menu.
Advanced PCSX2 Controller Settings & Adjustments
Let’s look into advanced PCSX2 controller settings that can elevate your gaming experience to a pro level:
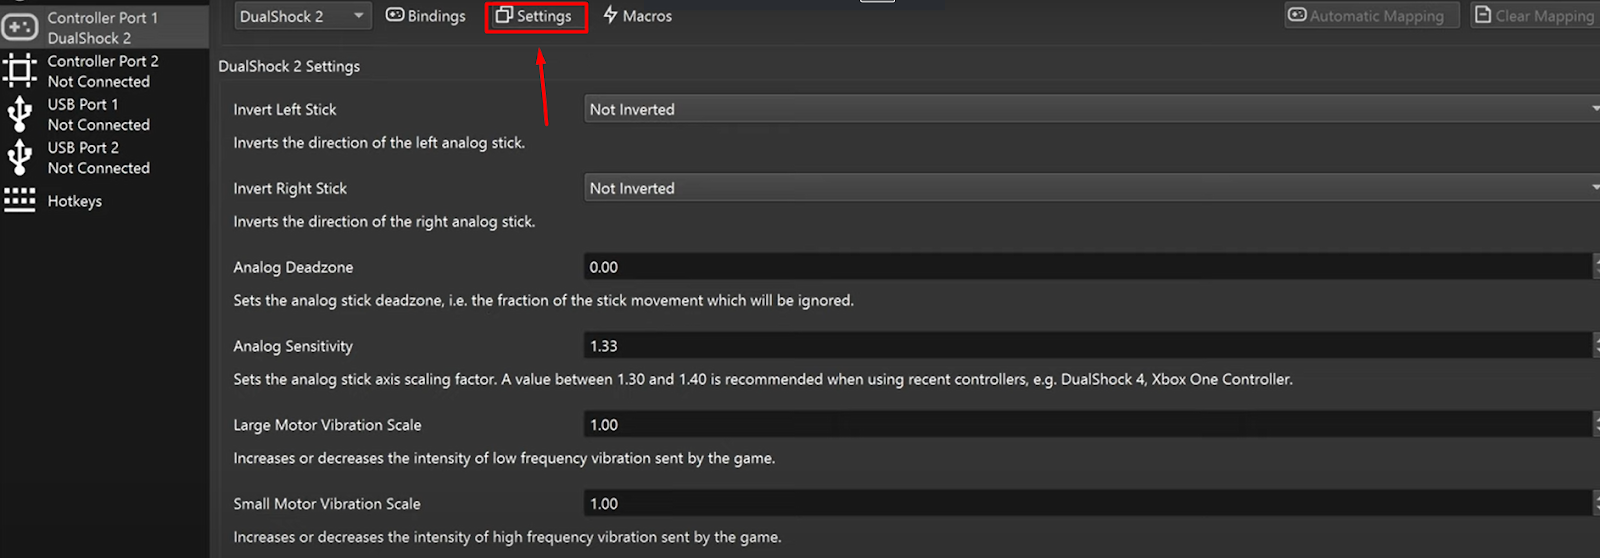
Dead Zones and Sensitivity
Dead Zones: These are regions around the center of your analog sticks where small movements won’t register. Adjust the dead zones to your preference. Smaller dead zones allow for more precise control.
Sensitivity: Increase sensitivity for faster response or decrease it for smoother, more gradual movements. Finding the right balance is crucial.
Custom Button Mapping
While automatic mapping is convenient, manually mapping buttons gives you fine-grained control. Assign specific functions to buttons based on your playstyle.
For example, map the L3 and R3 buttons (clicking the analog sticks) to valuable functions like camera control or item switching.
Advanced Controller Plugins
LilyPad handles input mapping. Explore its advanced settings:
Enable this for games that support pressure-sensitive inputs (e.g., racing games).
Adjust how the analog sticks respond to different input levels.
Configure vibration intensity.
Helpful in assigning keyboard keys to controller buttons.
SSPX PAD Plugin is another excellent option with advanced features.
Multi-Controller Setup
If you have multiple controllers, you can set up a multi-controller configuration. For multiplayer games, assign different controllers to different players.
Custom Scripts and Macros
Use AutoHotkey or similar tools to create custom scripts or macros. For example:
Turbo buttons: Rapidly press a button with a single press.
Combos: Execute complex button sequences with a single key press.
Toggle functions: Toggle between analog stick and D-pad controls.
Emulation Speedhacks
Some speed hacks can affect input responsiveness. Experiment with these cautiously:
EE Cyclerate: Adjusts the Emotion Engine (CPU) speed.
VU Cycle Stealing: Affects the Vector Unit (GPU) speed.
MTVU: Multi-Threaded microVU. It improves performance but may impact input timing.
Remember to save your settings after making adjustments.
Preconfigured Pcsx2 Controls (Controler Plugins)
Let’s break down the steps for saving and exporting your PCSX2 controller configuration, as well as loading and importing it:
How to Save and Export PCSX2 Controller Configuration?
Open PCSX2: Launch the PCSX2 emulator on your computer.
Configure Your Controller: Set up your controller by going to “Config” > “Controllers (PAD)” > “Plugin Settings.” Choose your controller plugin (e.g., LilyPad) and configure the buttons according to your preference.
Save Configuration: Once configuring your controller, click the “Pad 1” tab (or any other pad you use). Then click the “Save” button to save your controller configuration. You can choose a location and name for the configuration file (e.g., “my_controller_config.ini”).
Export Configuration: To export your configuration, locate the saved .ini file and copy it to a safe location (e.g., a backup folder or cloud storage). This way, you can easily import it later if needed.
How to Load and Import PCSX2 Controller Configuration?
Open PCSX2: Again, launch PCSX2.
Configure Your Controller Plugin: As mentioned earlier, set up your controller plugin (e.g., LilyPad).
Import Configuration: Go to “Config” > “Controllers (PAD)” > “Plugin Settings.” Click the “Load” button and select the .ini file you previously saved. This will load your preconfigured controller settings.
Test Your Configuration: Test your controller to ensure all buttons and analog sticks work correctly.
Remember to save your configuration after any changes to restore it later quickly. If you have any problems, see the PCSX2 manual or community forums for further assistance.
Using Third-Party Software to Configure Controls of PCSX2
Configuring controllers for PCSX2 can improve your gameplay experience. Let's go into the details of DS4Windows and Xpadder:
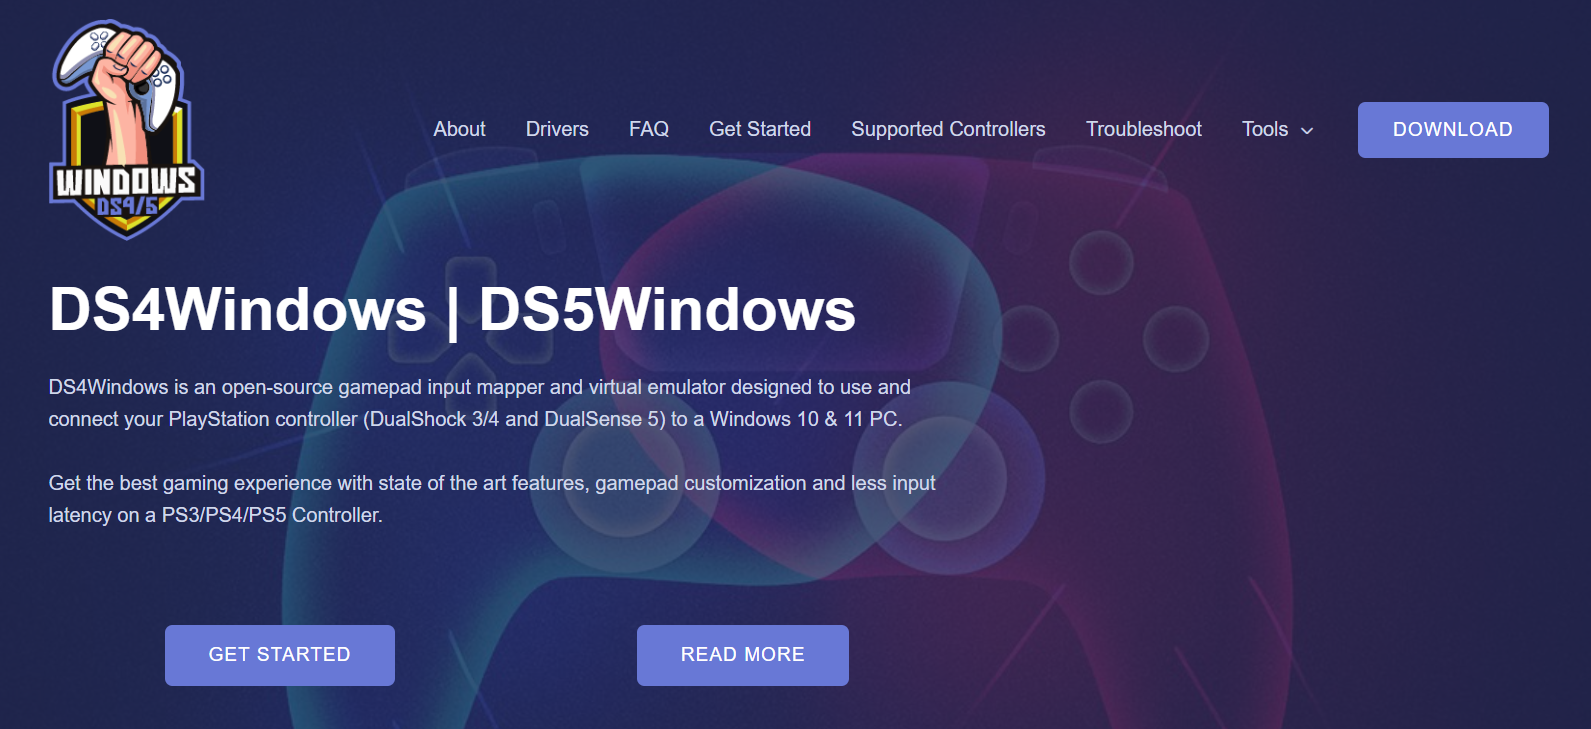
DS4Windows (for DualShock Controllers)
DS4Windows is a popular program that lets you utilize your DualShock 4 (PS4) controller on Windows. It helps play PS2 games on PCSX2. Here's how you set it up:
First, get DS4Windows from the official website and download and install it.
Select "Devices and Printers" after setting the Control Panel's "View by" option to "Large icons."
Press and hold the Share and PS buttons on your PS4 controller simultaneously until the controller lights begin to flash.
Click “Add a device” on your computer at the window's top-right corner. Wait for your computer to detect your controller.
Xpadder
Xpadder is another third-party application that lets you map keyboard and mouse inputs to your gaming gamepad. While not explicitly intended for PCSX2, it may be used to customize any controller for various games.
Download and install Xpadder.
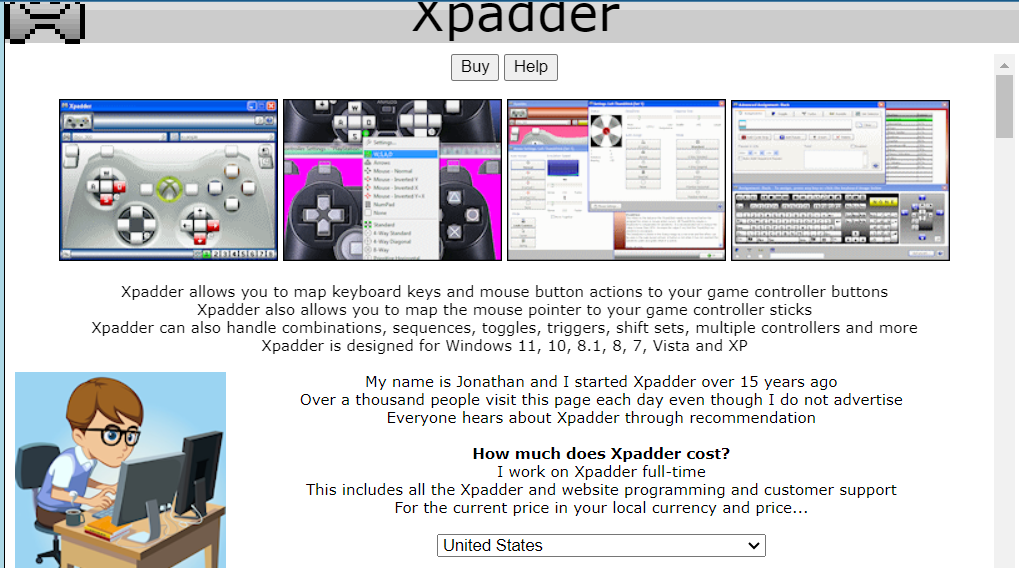
Launch Xpadder and make a new profile for your controller.
Set the buttons and analog sticks corresponding to keyboard keys or mouse motions.
Save the profile and make sure it’s active while running PCSX2.
Troubleshooting PCSX2 Controller Setup
Let’s examine troubleshooting PCSX2 controller issues.
PCSX2 Controller Not Working - Common Issues
It might be irritating when your PCSX2 controller does not work correctly. Here are some frequent concerns and possible solutions:
Uninstall the controller driver: Some customers have claimed success after deleting the controller driver in Device Manager, disconnecting the device, and reconnecting it. Windows will automatically reinstall the driver.
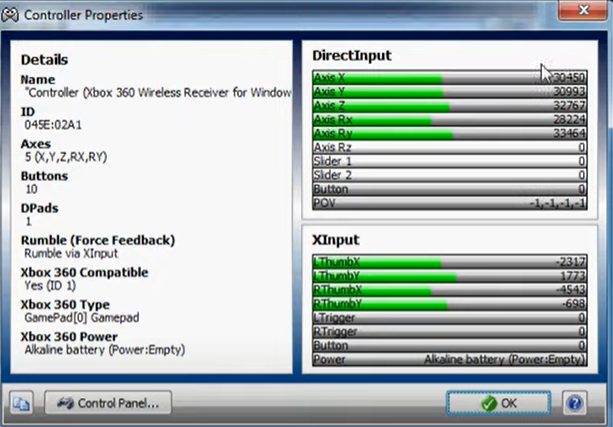
Change Game Device APIs: In PCSX2, go to Config > Controllers > Plugin Settings > General > Game Device APIs. Uncheck XInput and try configuring your gamepad with DirectInput mode. If you’re using an Xbox controller, stick with XInput mode.
PCSX2 Not Detecting Controller
If PCSX2 doesn’t recognize your controller, follow these steps:
Access Controller Configuration: Open PCSX2 and navigate to Config > Controllers > Plugin Settings.
Choose Input Source: Select the appropriate input source:
SDL (Recommended): Cross-platform and works well for most controllers.
SDL Raw Input: This is for unresponsive or incorrectly mapped controllers. Manually map controls if needed.
DualShock 4 / DualSense Enhanced Mode: Enable this for official DualShock 4 and DualSense controllers.
XInput: Use only if you have an XInput-compatible device.
DInput: Older input source for specific controllers2.
Controller Lag or Delay
Input lag can affect gameplay. Consider the following steps:
Check for Deadzones: Deadzones are areas where the analog stick doesn’t fully register input.
Detect Deadzones: Use tools like Gamepad Tester to detect deadzones.
Adjust Settings: Adjust settings in Windows or Steam to compensate.
Controller Deadzone
A deadzone refers to the area around the center of an analog stick where minimal input is registered. To fix deadzones:
Windows Game Controllers: To access the Windows Game Controllers window, type “controllers” in the Start menu search bar. Click “Set up USB Controllers,” select your controller, go to the “Settings” tab, and click “Reset to default” to adjust deadzones3.
Steam: In Steam, go to “Steam -> Settings,” click “Controller,” then “General Controller Settings.” Adjust dead zone compensation.
Remember to test your changes in PCSX2 after adjusting deadzones. These steps will help you get your controller working smoothly for an enjoyable gaming experience!
FAQs
Can I use a wireless PS4 Controller with PCSX2?
Wireless PS4 controllers may connect to a PC using Bluetooth or a suitable wireless adaptor.
Why is my PS4 Controllers not working correctly with PCSX2?
Various difficulties, including outdated drivers or wrong controller plugin settings, might cause this. For the solution, refer to the troubleshooting section.
Can I use the PS4 Controller’s touchpad on PCSX2?
Some custom plugins may provide partial functionality for the touchpad. But complete use may differ.
Conclusion
Setting up your controller for the PCSX2 emulator lets you play PS2 games on your computer. You can use different controllers, like USB or Bluetooth ones, and follow easy steps to connect them.
Each type of controller, whether it's Xbox, PS3, PS4, or PS5, has specific instructions to make it work with PCSX2. If you run into problems, there are simple fixes like changing settings or adjusting dead zones. You can enjoy your favorite PS2 games with your preferred controller with the correct setup.